DIY: Flower pen
Hello ladies and gents,
Have you ever seen these flower pens and wonder how they were made, well
I'm going to show you today, these make really cute gifts for any occasion really,
I have made a few for a friends wedding and know have done some for my sisters wedding
so lets get started shall we.

These are the supplies you are going to need:
hot glue gun, floral tape, artificial flowers,
scissors, and your choice of pen.

Step 1:
When you remove the flower of the step they end up having extra stem attached
you want to cut that of with out cutting to much that the flower falls apart.
DISCLAIMER: if your under age please have an adult present when doing this project

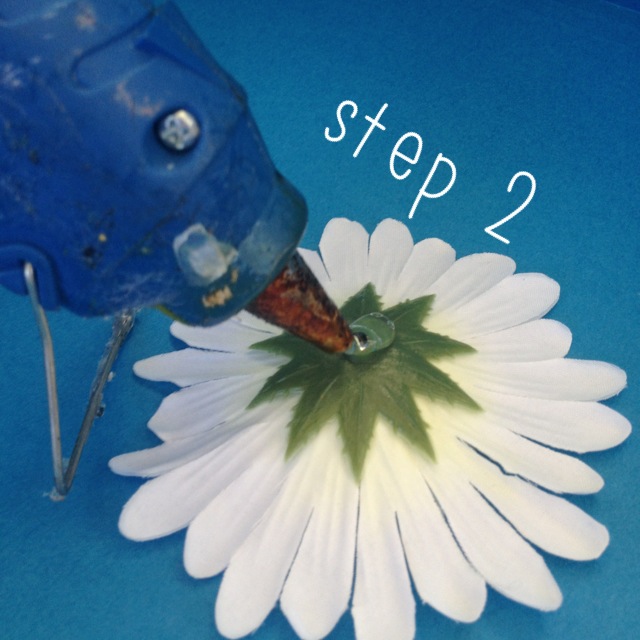
Step 2
When you have cleaned up your flower, apply a small amount on the middle of the flower,
the reason we cut the extra stem was so we can get the flow as close as we can to the top
of your pen.
Step 3
Set your choice of pen in the center of the flower hold it for a few seconds and
turn it over to see if the pen is in the center you have a few seconds to adjust it before it
completely drys.

Step 4
Apply a small amount were the base of the flower and pen meet, this is just to
assure that the floral tape isn't going to move, then begin to rap all the way to, well as fare as you want to go.

if you have a pen like mine you will need to stop were the lid would stop, that way
you can still cover the pen,
know if you have a click pen then you can go all the way to the end of the pen like the first picture.
And That is it, I hope this wasn't so difficult to follow.

If any of you do recreate this please tag me in them so I can see them.
please follow me on
twitter @cjsmakeup
YouTube: cjsmakeup
pinterest: cjsmkeup
♥ have an fun weekend.♥

Comments
Post a Comment